- HubPages»
- Home and Garden»
- Kitchen»
- Kitchen Electronics»
- Blenders & Mixers
Updated on April 23, 2015
Alison is a freelance writer and researcher. She also enjoys trying out new recipes and equipment in her gluten-free kitchen.
Contact Author
If you already have a KitchenAid mixer, or are thinking of buying one, we are going to take a look at the range of stand mixer attachments that make food preparation a breeze and are a joy to use.
You may already have a wish list of your own and if you know someone who owns a Kitchen aid, these attachments make great and very acceptable gifts at any time of the year.
In this article we look at attachments for
- Ice Cream
- Food Grinding
- Pasta
- Slicing and Shredding
KitchenAid is a registered trademark
Ice Cream Attachment
Homemade ice cream is delicious! It used to be that making ice cream at home was something that took a lot of work.
I can remember doing the hand cranking as a child and getting a very sore arm. Good results were not guaranteed and the process was messy.
But just see how easy it is with the Kitchenaid attachment for making ice cream in the video below!
Make Your Own Delicious Ice Cream!
Convert Your Stand Mixer into an Ice Cream Maker!
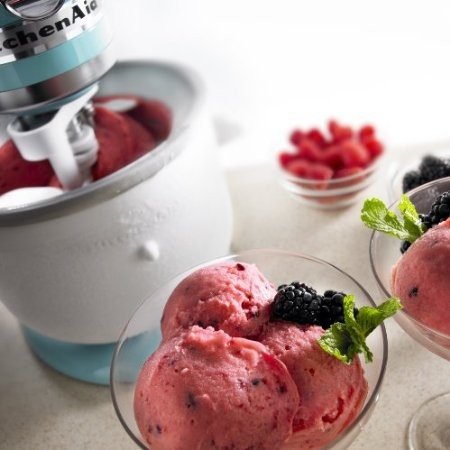
You can convert any Kitchenaid stand mixer built after 1990 into an ice cream making machine that is both stylish and easy to use. Just choose the appropriate bowl size for your mixer, two sizes are available, one for 5-6 quart mixers and one for 7 quart mixers.
To make perfect ice cream, freeze the bowl overnight in the freezer for at least eighteen hours.
The bowl is double-walled, and between the walls is a liquid that works in much the same way as one of those re-freezable ice packs you would use to keep food cold at a picnic.
It retains its cold temperature so well that when it comes time to make the ice cream it only takes about twenty minutes to do it.
- Prepare an ice cream custard or a fruit mix for sorbet following your favorite recipe.
- Remove the bowl from your freezer and put this and the paddle (supplied with this attachment), on your Kitchenaid stand mixer.
- Turn it on, using the slowest speed, and add your custard, sorbet fruit mix, or some yogurt.
- Simply let the mixer stir until the contents freeze.
It will be a soft consistency like a soft serve ice cream cone, and it can be eaten that way, but if you want it to be firm simply put it in the freezer after transferring it to a bowl with a lid.
Ice Cream Making Demonstration
The bowl is available in two sizes to fit either a 5-6 quart mixer or a 7 quart mixer - you can choose the appropriate size on the product page - big discounts at Amazon!
Top KitchenAid Ice Cream Making Tips
For the best results, there are a number of things you should keep in mind.
- Each KitchenAid mixer is a little different, so be sure that you know how to attach the bowl and paddle to the mixer before you try making ice cream for the first time.
- It helps if you freeze the bowl for an extra long time so try keeping it in the freezer all the time if you have room.
- Try making less than the full two quarts to avoid overflows and for shorter freezing times.
- Remember that the freezing process increases sweetness, so don't make your recipe too sweet.
After using the bowl, it's also very easy to wash it. Simply use a mild dish washing detergent and warm water.
KitchenAid Food Grinder Attachment
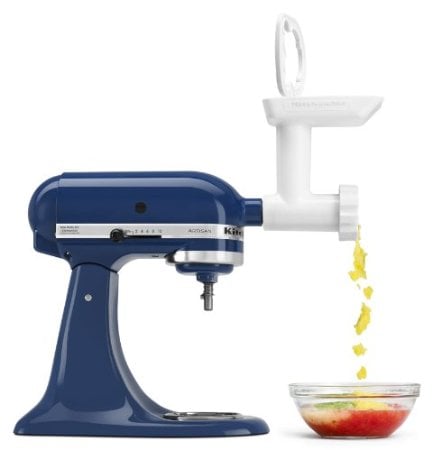
Adding the grinder attachment will harness the powerful stand mixer motor by attaching to the power hub. Although often referred to as the Kitchenaid meat grinder attachment, in fact, it will enable you to do everything from grinding raw meat to making breadcrumbs. It comes with two grinding plates.
How to Use the Two Grinding Plates
- The coarse one is for raw meats, making meatloaf and combining ingredients for recipes such as salsa.
- The fine one is for grating cheese or making breadcrumbs.
When using the grinder attachment, cut meat into strips and other foods into strips or smallish pieces.
With the mixer speed set to 4, use the supplied pusher/wrench to feed the prepared foods into the hopper.
KitchenAid advise that if you are grinding foods that have a high moisture content, (like tomatoes, for example), liquid juices may appear in the hopper. If this happens, keep the machine running and don't add any more food until this excess liquid has drained out to avoid any potential damage to the mixer.
Using the Meat Grinder Attachment for Your Kitchenaid Mixer
Top Tips for using The Grinding Attachment
- For best results when grinding beef, put it through the grinder twice. This will produce very tender ground beef.
- The best texture will be obtained by grinding meat that is very cold.
- If the meat is very fatty, only put it through the grinder once.
- When grinding bread, if it has partly dried out, complete the drying process in the oven before grinding as partially dried pieces of bread can cause the grinder to jam.
- Close textured homemade bread should not be turned into crumbs unless it is fresh.
- The ring that fits over the grinder body needs to be removed when disassembling the attachment for cleaning. If it has become tight, you can use the food pusher/wrench to loosen it (do not use this tool to tighten the ring when assembling the attachment as this could cause damage).
- All parts of the food grinder are dishwasher safe once disassembled with the exception of the knife and grinding plates. These are easy to wash in warm sudsy water and a small toothbrush is very useful for cleaning them! Dry thoroughly before storing.
Double Cheese Beef Burgers!
Pasta Attachments
There are different pasta maker attachments available.
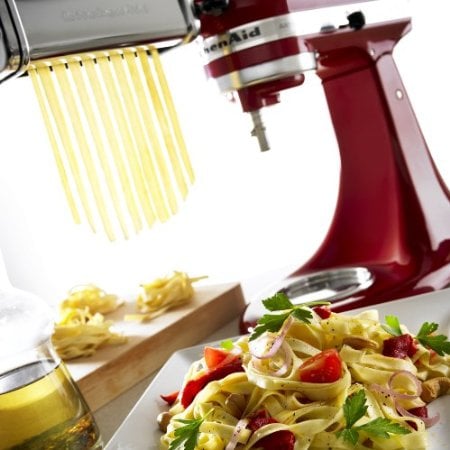
The one I like the best is the KPRA pasta roller attachment which actually comprises two main components, a roller and a spaghetti cutter.
I will tell you more about this in more detail in a moment but you might also like to know that there is also a 
In addition there is a 
Choosing Pasta Thickness Settings
Setting | Use |
|---|---|
1 or 2 | Initial rolling and thinning of dough |
3 | Thick egg noodles |
4 | Egg noodles |
4 or 5 | Lasagne, fettuccine, ravioli, spaghetti |
6 or 7 | Tortelline, thin fettucine |
7 or 8 | Angel hair |
Safety Tips For Using Your KitchenAid Pasta Attachments
This is a very versatile set which enables a wide variety of pasta to be made. It is ONLY designed for pasta dough though, never put anything else in it, NEVER immerse any of the parts in water or place in your dishwasher.
You must only use the supplied cleaning brush to remove any remnants of dough after use and toothpicks are excellent for getting any last little specks out of the corners!
For your own safety, make sure you remove any long necklace, scarf, tie or anything else that could get caught in the roller with serious consequences!
How To Make Fettuccine With Your Pasta Maker
Easy to Make Your Pasta in a Big Batch!
If you prefer to make your pasta in a big batch, you can dry it or freeze it for later use. KitchenAid make a pasta drying rack for air drying and you can just hang the strands of pasta on it until they are completely dry before storing in an airtight container.
Alternatively, you can lay pasta onto a clean kitchen towel and leave to dry. If you wish to freeze your pasta, it is still necessary to let it air dry for an hour or so before freezing.
The Easy Way To Dry Pasta
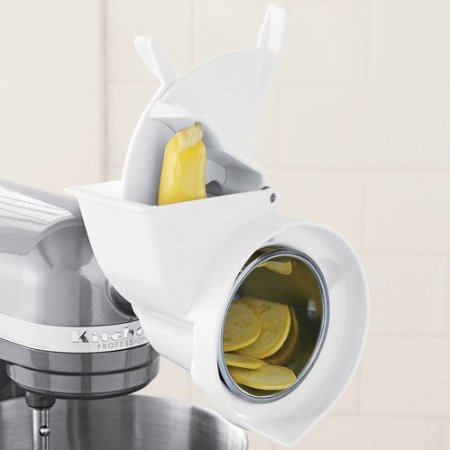
What do you get with your Slicer Shredder Attachment?
This comes with four interchangeable steel cones.
- Two are for slicing and allow you to prepare thick or thin slices of firm vegetables and fruits.
- Two are for shredding and allow you to prepare fine or coarse shreds of crisp vegetables, hard cheeses and nuts.
How To Make Coleslaw (The Easy Way)!
Save Money By Buying Attachments for Your Stand Mixer!
KitchenAid Mixers are so well made and powerful, they will give very long and reliable service. It makes sense to use yours to the max by buying attachments for all these extra kitchen tasks, rather than buying separate appliances for each job!
KitchenAid mixer attachments provide an economical solution that also frees up counter top space as the attachments can be stored away until needed.

